How to Merge People's Faces in A Life Portrait
- david cortez
- Jun 4, 2025
- 2 min read

Updated: Jun 17, 2025
Sometimes, the same person might appear multiple times in your gallery under slightly different faces, especially when photos span across years, ages, and even generations. That’s where our Face Merging feature comes in handy.
Here’s how to merge faces and keep your memories beautifully organized:
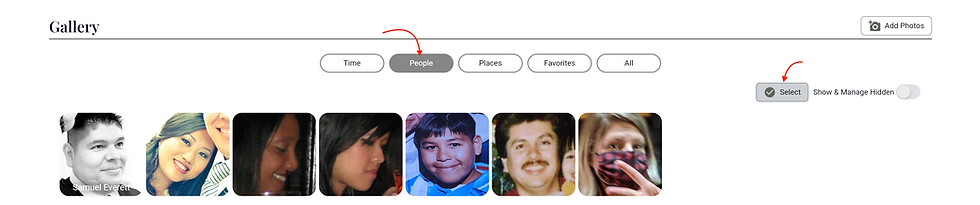
1. Navigate to the People Grouping
Go to the People section in your A Life Portrait project.
You’ll see a collection of all detected faces across your photos.
Look for faces that belong to the same person, even if they appear slightly different across images.
2. Select Faces to Merge
Click on Select
Choose the faces you wish to combine. You can select multiple faces at once from the People Grouping view.
Alternatively, if you’re viewing the photos for a single person, you can choose the “Merge w/ Another” option to select and merge similar faces from there.
Once you are done click Mark as Same.
3. Confirm the Merge
When you merge, all photos associated with those faces will be grouped under the person with the most photos.
If one of the faces is an Honoree (the person the Portrait is about), new Age Verification Notifications may show up to help more accurately organize the photos.
4. Enjoy a More Organized Portrait
The merged faces will now appear as a single, unified person across all relevant photos in your Portrait.
This makes browsing, creating movies, and adding memories smoother and more meaningful.
Every face holds a story, and merging them helps preserve your loved one’s legacy with clarity and care. Whether you’re just starting or adding new memories, take a moment today to tidy up your portrait. It’s a small step that makes a big difference. Log in now and see how easy it is to merge faces and create a more complete picture of a life well-lived.


Comments